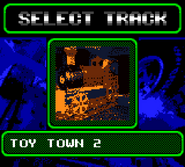
No edit summary |
(Added image) |
||
| (14 intermediate revisions by 3 users not shown) | |||
| Line 1: | Line 1: | ||
| + | {{Infobox track |
||
| − | <div style="float:right;"> |
||
| + | |name=Toy World 2 |
||
| − | {| border="1" |
||
| + | |image=Toy2 infobox thumbnail.png |
||
| − | | colspan="2"| [[File:toy2.png|thumb|230px|Toy World 2 track selection picture]] |
||
| + | |type=Standard Track |
||
| − | |- |
||
| + | |length=444 metres<br>433 metres ([[reversed]]) |
||
| − | | style="width: 10px;"| Author: |
||
| + | |cup=Medium |
||
| ⚫ | |||
| + | |time=00:37:000<br>01:02:000 ([[Re-Volt (PS1)|PS1]]) |
||
| − | |- |
||
| + | |folder=toy2 |
||
| − | | style="width: 10px;"| Folder Name: |
||
| ⚫ | |||
| − | | style="width: 20px;"| toy2 |
||
| + | |redbook=4 9 |
||
| − | |- |
||
| + | |normal=Win [[Bronze Cup]] in |
||
| − | | style="width: 10px;"| Soundtrack: |
||
| + | [[Championship]] |
||
| − | | style="width: 20px;"| Toys For The Boys.mp3 |
||
| + | |reverse=Beat the Challenge times for [[Medium]] tracks in [[Time Trial]] |
||
| − | |- |
||
| + | |mirror=Beat the Challenge times in Reverse |
||
| − | | style="width: 10px;"| Length: |
||
| + | |rm=Beat the Challenge times in Mirror |
||
| − | | style="width: 20px;"| 444m |
||
| + | |previous=[[Ghost Town 1]] |
||
| − | |- |
||
| + | |next=[[Toys in the Hood 2]] |
||
| − | | style="width: 10px;"| Difficulty/Cup: |
||
| ⚫ | |||
| − | | style="width: 20px;"| Medium/Silver |
||
| + | [[Toy World 2]] is a [[standard track]], created by [[Acclaim Studios]]. It is the fourth and final track in [[Silver Cup|Silver Cup Championship]]. Featuring more narrow and tight turns, Toy World 2 is slightly more complex than [[Toy World 1]]. |
||
| − | |- |
||
| − | | style="width: 10px;"| [[Mirrored|Mirrorable?]] |
||
| − | | style="width: 20px;"| Yes |
||
| − | |- |
||
| − | | style="width: 10px;"| [[Reversed|Reversable?]] |
||
| − | | style="width: 20px;"| Yes |
||
| ⚫ | |||
| − | </div> |
||
| − | '''Toy World 2''' is a stock track, created by [[Acclaim Studios]]. It's in the [[Silver Cup]] at the [[Championship]] mode. |
||
| + | ==Course Layout== |
||
| ⚫ | |||
| + | Racers start at the start of a narrow long stretch. Intersecting this path is a railway crossroad for large trains that appear every now and then. The long straight results in a moderate 180 degree right turn, leading to yet another railway crossing. |
||
| − | * Near start after every few minutes, train shows on road blocking your way, although it doesn't block all road. |
||
| + | After the crossing is a slight right turn, but is immediately followed by a very sharp left hairpin. The track then branches off into two different paths. The first route features a wide left turn. The second route however, follows through a dark tunnel which eventually leads to a small jump across the first path. Both routes then converge. |
||
| − | == Additional Information == |
||
| ⚫ | |||
| + | An acute left turn follows, leading the racers up an incline. After a small straight, racers then make a hard right 180 degree turn with a very sharp drop in elevation. Two soft left bends subsequently follow, culminating in a moderate right bend with an upward slope featuring a fire-breathing dragon, completing the lap. |
||
| ⚫ | |||
| ⚫ | |||
| ⚫ | |||
| + | As mentioned in the introduction and course layout, Toy World 2 is more difficult than [[Toy World 1]] due to the increased amount of curves and elevations. Vehicles with a poor acceleration and turning radius such as [[Candy Pebbles]] and [[Genghis Kar]] respectively, will tend to struggle in this track, as they will be very slow around many of its corners. |
||
| ⚫ | |||
| + | |||
| + | The most notable of this is the yellow-carpeted steep turn that lies a few seconds away from the starting line. Reckless drivers who undertake the corner at a very fast speed will most likely lose control and flip over. As one of the final corners in the track, it can make or break the race. |
||
| + | |||
| + | Toy World 2 also has large toy trains pass by the crossings every once in a while, which is the track's most significant obstacle. The wheels of the trains obstruct the racing line of many players, and contact with them will cause the vehicle to be disrupted heavily, wasting precious time. |
||
| + | |||
| + | Aside from that, Toy World 2 does not have many explicit obstacles, but it is rather the track's layout itself that forms the crux of its difficulty. |
||
| + | |||
| + | ==Strategies== |
||
| + | Due to the narrow and tight turns, vehicles with excellent acceleration and handling characteristics perform best in this tracks. Some examples in the [[Amateur]] rating are [[RC San]], [[Aquasonic]], or [[LA 54]]. These cars are able to tackle the tightest corners at an exceptional pace, outrunning its competitors in the race. |
||
| + | |||
| + | There is a very narrow strip that follows right after the first railway crossing. Trap items such as the [[Oil Slick]] and [[Clone Pick Up]] are very effective there, guaranteeing hits. The AI are also programmed to place items here more often than usual. |
||
| + | |||
| + | Due to the shortness of the track's walls, it is a viable technique to send opponents across the sidewalks. Items such as the Clone Pick Up, the [[Firework]], or [[Shockwave]] can send them flying outside the boundaries of the track. |
||
| + | |||
| + | Finally, at the fork intersection, the left route is superior. This is because it is easier, as the route only consists of a wide left turn, compared to the tight turn and final jump that lies in the second route. It is also risky because failing the jump will cause significant time to be lost, as the second part after the jump is much shorter. |
||
| + | |||
| + | ==Star Locations== |
||
| + | <tabber>Global Pulse=[[File:Toy2gs.png|thumb|250px]] |
||
| + | The [[Global Pulse]] star is located at the crossing jump at the second route when the paths branches off. It is at the top right corner. Angle the vehicle to its location to reach it, or make the jump and drive across the edge of the ramp.<br><br><br><br><br> |
||
| ⚫ | |||
| + | In the [[Re-Volt (PS1)|PlayStation version]], the star is instead located on the left end of the second railway crossing.<br><br><br><br><br><br><br><br> |
||
| + | |-|Practice Star=[[File:Toy2ps.png|thumb|250px]] |
||
| + | The [[Practice]] star is also located in the same area, at the jump but instead is situated on the bottom left corner. The star is nabbed by simply driving across the edge of the ramp.<br><br><br><br><br><br></tabber> |
||
| + | |||
| + | ==Triva== |
||
| ⚫ | |||
| + | * The Toy World location is the only area to have both of its counterparts in the same difficulty. In this case, [[Toy World 1]] and 2 are both listed in the [[Medium]] difficulty. |
||
| + | * The [[Re-Volt (PS1)|PlayStation version]] has Toy World 2 unavailable in Multi-Player due to technical limitations. |
||
| + | |||
| ⚫ | |||
| + | <gallery hideaddbutton="true"> |
||
| + | File:Toy2.png|Toy World 2 gfx art. |
||
| + | Toy2Startpos.png|The starting grid. |
||
| + | Toy2Layout10.png|The first train crossing. A near miss into [[Evil Weasel]]. |
||
| + | Toy2Layout11.png|The second train crossing, with [[LA 54]] colliding into the train. |
||
| + | Toy2Layout3.png|The sharp hairpin before the fork road. |
||
| + | Toy2Layout4.png|The fork intersection. [[Mouse]] selects the right path. |
||
| + | Toy2Layout5.png|The long left bend in the first path. |
||
| + | Toy2Layout6.png|[[RC San]] and [[Evil Weasel]] under the tunnel of the second path. |
||
| + | Toy2Layout7.png|Jumping from one ramp into another on the second route. |
||
| + | Toy2Layout8.png|The sharp hairpin after the two paths converge. |
||
| + | Toy2Layout9.png|The very steep incline and curve. [[Panga TC]] loses control due to its poor stability. |
||
| + | Toy2Layout1.png|Various RC cars avoid the intimidating dragon. |
||
| + | Toy2Layout2.png|The last sharp bend. |
||
| + | File:Toy2Alt.jpg|[[Adeon]] under the large toy train. |
||
| + | Gbc toy2.png|GFX art for the discontinued [[GBC port]]. |
||
| + | </gallery> |
||
| + | |||
| + | ==See Also== |
||
| + | *[[Toy World 1]] |
||
| + | [[Category:Tracks]] |
||
| + | [[Category:Standard Tracks]] |
||
| ⚫ | |||
Revision as of 00:58, 22 April 2019
Toy World 2 is a standard track, created by Acclaim Studios. It is the fourth and final track in Silver Cup Championship. Featuring more narrow and tight turns, Toy World 2 is slightly more complex than Toy World 1.
Course Layout
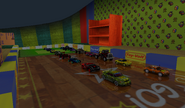
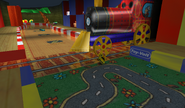
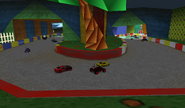
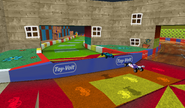
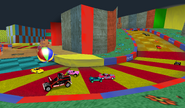
Racers start at the start of a narrow long stretch. Intersecting this path is a railway crossroad for large trains that appear every now and then. The long straight results in a moderate 180 degree right turn, leading to yet another railway crossing.
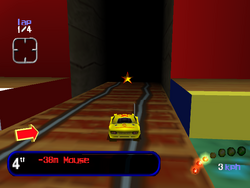
After the crossing is a slight right turn, but is immediately followed by a very sharp left hairpin. The track then branches off into two different paths. The first route features a wide left turn. The second route however, follows through a dark tunnel which eventually leads to a small jump across the first path. Both routes then converge.
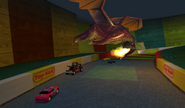
An acute left turn follows, leading the racers up an incline. After a small straight, racers then make a hard right 180 degree turn with a very sharp drop in elevation. Two soft left bends subsequently follow, culminating in a moderate right bend with an upward slope featuring a fire-breathing dragon, completing the lap.
Hazards/Obstacles
As mentioned in the introduction and course layout, Toy World 2 is more difficult than Toy World 1 due to the increased amount of curves and elevations. Vehicles with a poor acceleration and turning radius such as Candy Pebbles and Genghis Kar respectively, will tend to struggle in this track, as they will be very slow around many of its corners.
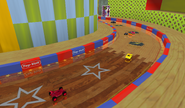
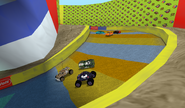
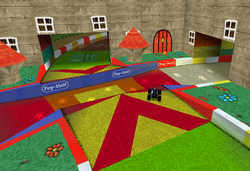
The most notable of this is the yellow-carpeted steep turn that lies a few seconds away from the starting line. Reckless drivers who undertake the corner at a very fast speed will most likely lose control and flip over. As one of the final corners in the track, it can make or break the race.
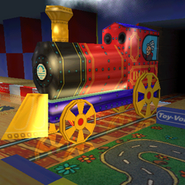
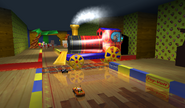
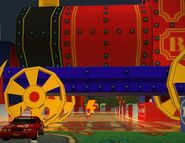
Toy World 2 also has large toy trains pass by the crossings every once in a while, which is the track's most significant obstacle. The wheels of the trains obstruct the racing line of many players, and contact with them will cause the vehicle to be disrupted heavily, wasting precious time.
Aside from that, Toy World 2 does not have many explicit obstacles, but it is rather the track's layout itself that forms the crux of its difficulty.
Strategies
Due to the narrow and tight turns, vehicles with excellent acceleration and handling characteristics perform best in this tracks. Some examples in the Amateur rating are RC San, Aquasonic, or LA 54. These cars are able to tackle the tightest corners at an exceptional pace, outrunning its competitors in the race.
There is a very narrow strip that follows right after the first railway crossing. Trap items such as the Oil Slick and Clone Pick Up are very effective there, guaranteeing hits. The AI are also programmed to place items here more often than usual.
Due to the shortness of the track's walls, it is a viable technique to send opponents across the sidewalks. Items such as the Clone Pick Up, the Firework, or Shockwave can send them flying outside the boundaries of the track.
Finally, at the fork intersection, the left route is superior. This is because it is easier, as the route only consists of a wide left turn, compared to the tight turn and final jump that lies in the second route. It is also risky because failing the jump will cause significant time to be lost, as the second part after the jump is much shorter.
Star Locations
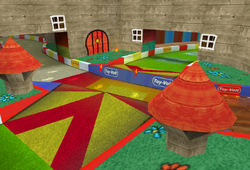
The Global Pulse star is located at the crossing jump at the second route when the paths branches off. It is at the top right corner. Angle the vehicle to its location to reach it, or make the jump and drive across the edge of the ramp.
Triva
- In Developer Version and old demos, Toy World 2 is set in Easy difficulty.
- The Toy World location is the only area to have both of its counterparts in the same difficulty. In this case, Toy World 1 and 2 are both listed in the Medium difficulty.
- The PlayStation version has Toy World 2 unavailable in Multi-Player due to technical limitations.

