No edit summary |
(Added image: 3 gbc images) |
||
| (28 intermediate revisions by 3 users not shown) | |||
| Line 1: | Line 1: | ||
| + | {{Infobox track |
||
| − | <div style="float:right;"> |
||
| + | |name=Museum 2 |
||
| − | {| |
||
| + | |image=Muse2 infobox thumbnail.png |
||
| − | | colspan="2"| [[File:Muse2.png|thumb|230px|Museum 2]] |
||
| + | |type=Standard Track |
||
| − | |- |
||
| + | |length=600 metres |
||
| − | | style="width: 10px;"| Author: || style="width: 20px;"| [[Acclaim Studios]] || |
||
| + | |cup=Easy |
||
| − | |- |
||
| + | |time=00:45:000<br>01:05:000 ([[Re-Volt (PS1)|PS1]]) |
||
| − | | style="width: 10px;"| Folder Name: || style="width: 20px;"| muse2 || |
||
| + | |folder=muse2 |
||
| − | |- |
||
| + | |author=[[Acclaim Studios London]] |
||
| − | | style="width: 10px;"| Soundtrack: || style="width: 20px;"| Toys For The Boys.mp3 || |
||
| + | |redbook=4 9 |
||
| − | |- |
||
| + | |normal=Available at start |
||
| − | | style="width: 10px;"| Length: || style="width: 20px;"| 600m || |
||
| + | |reverse=Beat the Challenge times for [[Easy]] tracks in [[Time Trial]] |
||
| − | |- |
||
| + | |mirror=Beat the Challenge times in Reverse |
||
| − | | style="width: 10px;"| Difficulty: || style="width: 20px;"| Easy || |
||
| + | |rm=Beat the Challenge times in Mirror |
||
| − | |- |
||
| + | |previous=[[SuperMarket 2]] |
||
| − | | style="width: 10px;"| [[Mirrored|Mirrorable?]] || style="width: 20px;"| Yes || |
||
| + | |next=[[Botanical Garden]] |
||
| − | |- |
||
| ⚫ | |||
| − | | style="width: 10px;"| [[Reversed|Reversable?]] || style="width: 20px;"| Yes || |
||
| + | [[Museum 2]] is a [[standard track]] created by [[Acclaim Studios]]. It is the third track in the game. It sets the racers in a natural history museum containing many ancient artifacts. The track's biggest feature is the planetarium, which compromises a large portion of the course layout. |
||
| ⚫ | |||
| + | |||
| − | </div> |
||
| + | ==Course Layout== |
||
| + | The race begins at a start of a glass walkway with two skeletal dinosaur models. The bridge leads to a hallway, which is composed of a slight right bend. The hallway takes the racers to the first part of the museum, which is the artifact showcase. A series of narrow small curves ensue, which then follows into a small room consisting of more extinct dinosaur skeletal models. At the end of the room is a sharp right, leading into the entrance of the planetarium titled 'Space Race'. |
||
| + | |||
| + | The entrance of the space museum consists of two escalators; the left side moves upwards, and the other moves in the opposite direction. The inclines lead to a very wide straightaway with concept artwork of various planets and space prototypes seen on the walls. A tight right turn ensues, leading to the planetarium's main display of the Solar System. |
||
| + | |||
| + | A circular glass walkway branching off into two directions surrounds the display, and they converge at the top of the circuit. This follows to a straightaway into a large round turn. Racers can see more factual information of the planets and a spaceship replica (known as the Lunar Lander) in this room. The turn leads to the exit of the planetarium and into a hallway that slopes straight down. At the end of the slope leads to another incline. A few small turns follows after a jump, leading to another hallway which features skeletal models of various sea animals. The start line lies right after this hallway, completing the lap. |
||
| + | |||
| ⚫ | |||
| + | Museum 2's hallways are very narrow, which in turn punishes vehicles who have a poor turning radius, such as [[Col. Moss]]. The glass surfaces in particular are fairly smooth, which diminishes the grip of some cars, especially [[RWD]] cars. While definitely easier than [[Museum 1]], the replicas prove to be an obstacle, as running into those can waste time. |
||
| + | |||
| + | The downhill slope can be a very difficult passageway, due to the speed gained during this section. For some cars, steering sharply at this stage can cause the car to lose control, so caution is advised. There is also a 'Wet Floor' signboard that acts as an inconvenient ramp after the slope, causing unsuspecting racers to go through it and fly off the desired racing line. |
||
| + | |||
| + | Finally, after the downhill slope there is a secret alternative route. The route is pointless and does not save time, and is intended rather to confuse the racers. |
||
| + | |||
| + | ==Strategies== |
||
| + | [[Pickups]] are effective in hallways as they are narrow. Trap items such as the [[Clone Pick Up]], [[Ball Bearing]], or [[Oil Slick]] are very effective in these areas. The Oil Slick also works best in surfaces colored black, such as in the planetarium, as it is difficult to spot where the item is dropped. |
||
| + | |||
| + | As for racing line strategies, players should always take the escalator which supports their direction. Entering the wrong side can cause a significant loss in speed and time. There is also a small shortcut right before the downhill ramp, in which racers can enter the site of the lunar lander replica instead of going around it. The viability of this shortcut is questionable due to the moon-like terrain at the site, which causes vehicles to lose speed upon entrance. Vehicles with an emphasis on off-road capabilities such as [[RC Bandit]] may travel through the shortcut much quicker than usual, however. |
||
| + | |||
| + | ==Star Locations== |
||
| + | <tabber>Global Pulse=[[File:Muse2globalp.PNG|thumb|250px]] |
||
| ⚫ | |||
| + | |-|Practice Star=[[File:Muse2practice.PNG|thumb|250px]] |
||
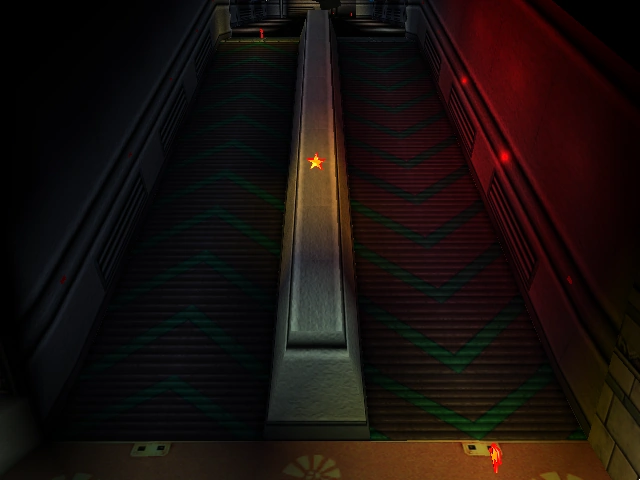
| + | The [[Practice|Practice star]] is located on the divider of the escalators. It is best to approach from the top end of the divider, as the incline is less steep there.<br><br><br><br><br><br></tabber> |
||
| + | |||
| ⚫ | |||
| + | * The [[Demos#Third_type:_Rolling_Demo|Rolling Demo]] has Museum 2 as a trial track, unlike many other demos that uses [[Toys in the Hood 1]] instead. |
||
| + | *In the Dreamcast version, this track has different positions of instances. |
||
| + | *In [[Dev]] version, this track doesn't have "slippery ground" signs. |
||
| + | *This track is labelled as Museum 2 despite it appearing before [[Museum 1]]. This inconsistency is shared with [[SuperMarket 2]]. |
||
| − | Museum 2 is a [[stock track]] created by Acclaim Studios. It sets the racers in a natural history museum day out, racing on dinosaur skeletons rooms, old artifacts, and also the "Space Race" that contains models of spaceships, an escalator and a planetarium. |
||
| ⚫ | |||
| − | *Corners of walls in fast lanes |
||
| − | *Shelves and showcases in the way |
||
| − | *Dinosaur skeletons |
||
| − | *False entries |
||
| − | *The escalator (if you take the wrong way) |
||
| − | *Bumpy floor and narrow section at "Apollo" shortcut |
||
| − | ==Stars Location== |
||
| − | ===Global Pulse=== |
||
| ⚫ | |||
| − | ===Practice Star=== |
||
| − | The Practice star is located in the middle of the two e<span style="line-height:20px;">scalators on top of the rail. Go by reversed mode and up the rail to take the star.</span> |
||
| ⚫ | |||
| − | ==Additional Information== |
||
==Gallery== |
==Gallery== |
||
| + | <gallery hideaddbutton="true"> |
||
| + | Muse2.png|Museum 2's gfx art. |
||
| + | Muse2 startgrid1.png|The starting grid. |
||
| + | Muse2 artifact showcase2.png|The artifact showcase hallway. |
||
| + | Muse2 narrow small curves3.png|Further deep into the hallway. |
||
| + | Muse2 dinosaur room2.png|[[RC Bandit]] in the dinosaur display room. |
||
| + | Muse2 space race2.png|The two escalators. |
||
| + | Muse2 planetarium1.png|The Solar System exhibit. The surrounding walkways form a circuit. |
||
| + | Muse2 spaceship replica2.png|The Lunar Lander replica display. |
||
| + | File:Muse2 hallway slope.png|The downhill hallway. |
||
| + | File:Muse2 end small turns2.png|[[Volken Turbo]] in the final hallway. |
||
| + | File:Muse2 fish skeletons.png|The sea animals display. |
||
| + | File:Muse2 alternative route2.png|The secret alternative route that resembles [[Museum 1]]. |
||
| + | Gbc muse2.png|GFX art for the discontinued [[GBC port]]. |
||
| + | Gbc muse race 1.png|[[Dr. Grudge]], [[Bertha Ballistics]] and [[Panga TC]] racing in the GBC version of the track. |
||
| + | Gbc muse race 2.png|[[Dr. Grudge]] and [[Panga TC]] racing in a further section. |
||
| + | </gallery> |
||
| + | |||
| + | ==See Also== |
||
| + | *[[Museum 1]] |
||
| + | [[Category:Tracks]] |
||
| + | [[Category:Standard Tracks]] |
||
| + | [[Category:Easy Tracks]] |
||
Revision as of 23:44, 21 April 2019
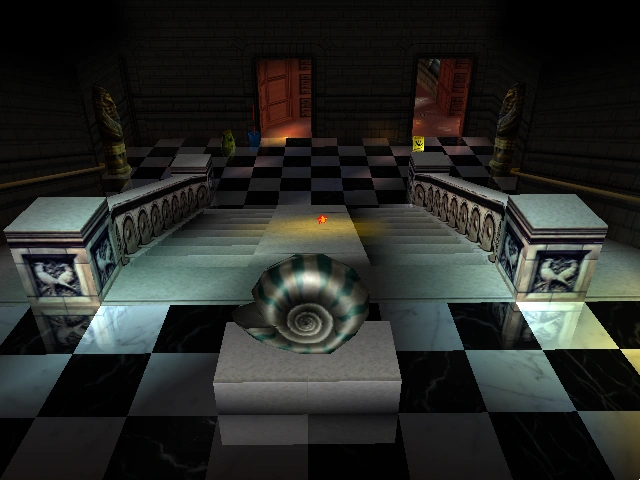
Museum 2 is a standard track created by Acclaim Studios. It is the third track in the game. It sets the racers in a natural history museum containing many ancient artifacts. The track's biggest feature is the planetarium, which compromises a large portion of the course layout.
Course Layout
The race begins at a start of a glass walkway with two skeletal dinosaur models. The bridge leads to a hallway, which is composed of a slight right bend. The hallway takes the racers to the first part of the museum, which is the artifact showcase. A series of narrow small curves ensue, which then follows into a small room consisting of more extinct dinosaur skeletal models. At the end of the room is a sharp right, leading into the entrance of the planetarium titled 'Space Race'.
The entrance of the space museum consists of two escalators; the left side moves upwards, and the other moves in the opposite direction. The inclines lead to a very wide straightaway with concept artwork of various planets and space prototypes seen on the walls. A tight right turn ensues, leading to the planetarium's main display of the Solar System.
A circular glass walkway branching off into two directions surrounds the display, and they converge at the top of the circuit. This follows to a straightaway into a large round turn. Racers can see more factual information of the planets and a spaceship replica (known as the Lunar Lander) in this room. The turn leads to the exit of the planetarium and into a hallway that slopes straight down. At the end of the slope leads to another incline. A few small turns follows after a jump, leading to another hallway which features skeletal models of various sea animals. The start line lies right after this hallway, completing the lap.
Hazards/Obstacles
Museum 2's hallways are very narrow, which in turn punishes vehicles who have a poor turning radius, such as Col. Moss. The glass surfaces in particular are fairly smooth, which diminishes the grip of some cars, especially RWD cars. While definitely easier than Museum 1, the replicas prove to be an obstacle, as running into those can waste time.
The downhill slope can be a very difficult passageway, due to the speed gained during this section. For some cars, steering sharply at this stage can cause the car to lose control, so caution is advised. There is also a 'Wet Floor' signboard that acts as an inconvenient ramp after the slope, causing unsuspecting racers to go through it and fly off the desired racing line.
Finally, after the downhill slope there is a secret alternative route. The route is pointless and does not save time, and is intended rather to confuse the racers.
Strategies
Pickups are effective in hallways as they are narrow. Trap items such as the Clone Pick Up, Ball Bearing, or Oil Slick are very effective in these areas. The Oil Slick also works best in surfaces colored black, such as in the planetarium, as it is difficult to spot where the item is dropped.
As for racing line strategies, players should always take the escalator which supports their direction. Entering the wrong side can cause a significant loss in speed and time. There is also a small shortcut right before the downhill ramp, in which racers can enter the site of the lunar lander replica instead of going around it. The viability of this shortcut is questionable due to the moon-like terrain at the site, which causes vehicles to lose speed upon entrance. Vehicles with an emphasis on off-road capabilities such as RC Bandit may travel through the shortcut much quicker than usual, however.
Star Locations
Triva
- The Rolling Demo has Museum 2 as a trial track, unlike many other demos that uses Toys in the Hood 1 instead.
- In the Dreamcast version, this track has different positions of instances.
- In Dev version, this track doesn't have "slippery ground" signs.
- This track is labelled as Museum 2 despite it appearing before Museum 1. This inconsistency is shared with SuperMarket 2.
Gallery
")
")
")
")
")
")
")
")
")
")
")
")
")
")
")